Flat Roof Membrane Cutting: Circular Saw Precision & Heat Control
By Aisha Ndlovu • 10th May

Introduction
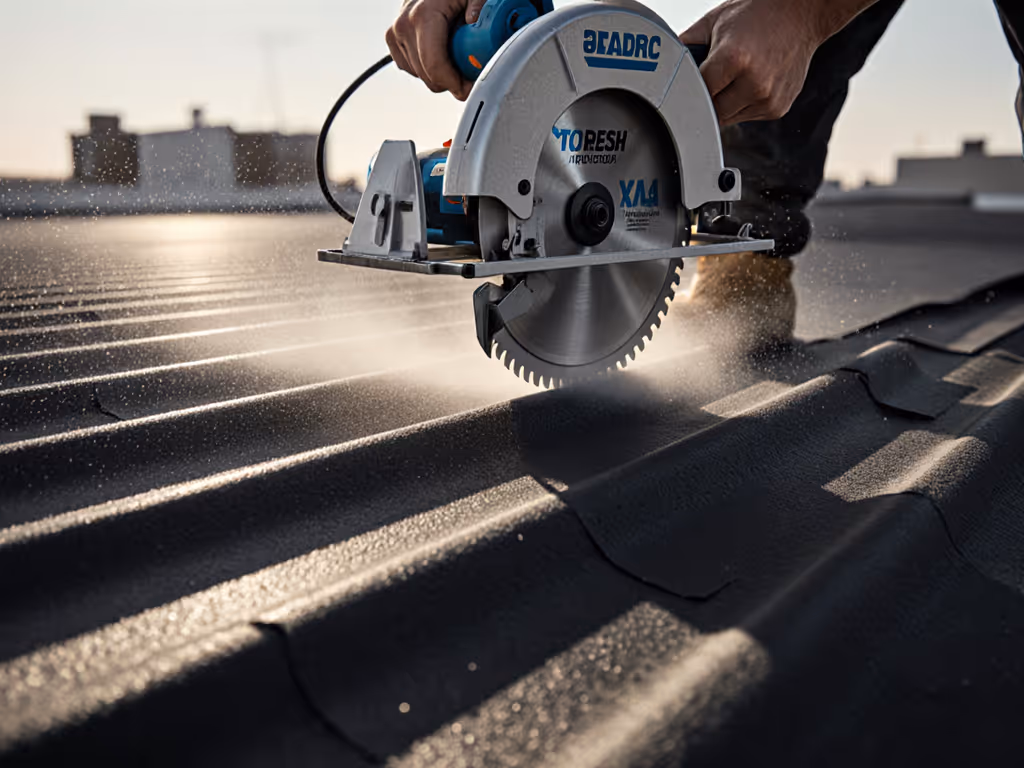
Cutting a flat roof membrane with a circular saw isn't just about clean edges; it's about preserving the material's integrity from the moment the blade touches it. Whether you're working with TPO, PVC, or other waterproof roofing membranes, the wrong tool, technique, or thermal management will set you up for sealing problems, thermal degradation, or wasted square footage.
The challenge is this: membranes are synthetic and thermally sensitive. Unlike framing lumber, where a slightly rough cut is often acceptable, roofing membranes demand consistency. A wandering blade creates poor seams. Excessive friction heats the polymer, causing it to weld to itself or become brittle. And the dust and debris (fumes from friction-heated plastic, micro-particles in the air) make this work feel urgent. I learned this lesson years ago on a commercial retrofit where a crew was cutting membrane with an under-specified saw, no dust capture, and no thermal oversight. The cut edges were already warped before the sealing team arrived. The client lost two days to rework.
This guide walks you through the complete process: tool selection, blade strategy, heat control during the cut, and the step-by-step execution that turns membrane cutting from anxiety-inducing to repeatable.
Why Precision Matters in Membrane Work
Flat roof membranes (particularly TPO and PVC) are unforgiving. For a material-specific overview comparing tool and blade behavior on common membranes, see our TPO vs EPDM roofing circular saw performance comparison. Unlike plywood where minor tear-out can be sanded or filled, membrane edges determine the quality of your seam. A ragged edge won't compress properly under the roller or adhesive process, leading to leaks. Thermal stress during cutting can also cause:
- Plastic creep or whitening: Overheated material stretches and loses clarity, weakening the seal.
- Bond surface degradation: If friction melts the outer layer, adhesive and heat-tape won't grip securely.
- Dimensional instability: Heat-induced contraction or expansion throws off your measurements after cutting.
This is why setup and tool choice are not afterthoughts. Comfort reduces errors; low strain yields cleaner lines, and on the roof, cleaner lines mean seals that hold.
Understanding Membrane Types and Their Cutting Behavior
TPO Roof Cutting Techniques
TPO (thermoplastic polyolefin) membranes typically range from 45 to 80 mils thick. They're more flexible than PVC and more forgiving of minor thermal stress, but they're also more prone to static cling and attracting dust. When cutting TPO:
- Blade speed should be moderate; too slow clogs the cut, too fast generates excessive heat.
- The membrane can cling to the blade during and after the cut, creating binding risk.
- TPO membranes are lighter in color, so heat damage shows immediately as discoloration.
- Feed rates between 2 and 4 inches per second are optimal, compared to 8-12 inches per second for structural lumber.
PVC Membrane Sawing
PVC (polyvinyl chloride) membranes are denser and more temperature-sensitive than TPO. A PVC membrane is stiffer, which means it resists vibration-induced wandering better, but it's also more likely to generate heat through friction. Characteristics:
- Cutting speed should be slightly slower than TPO to avoid melting or excessive edge discoloration.
- PVC emits a sharp chemical smell when overheated. This is your signal to back off immediately.
- The cut generates fine, sharp particles that should be captured; PVC dust suspended in air can remain airborne for 30+ minutes and may irritate respiratory tissues.
- A fact confirmed by industry data: uncontrolled PVC cutting in enclosed spaces produces dust concentrations that exceed recommended exposure levels within 5 minutes of sustained cutting.
The difference is real. On a recent job, I cut a 60-mil PVC section at standard circular saw RPM and felt the blade grab. The membrane edge whitened where friction was highest. I dropped the feed rate by 30%, used a dust-collecting shroud, and the second cut came clean with no thermal damage.
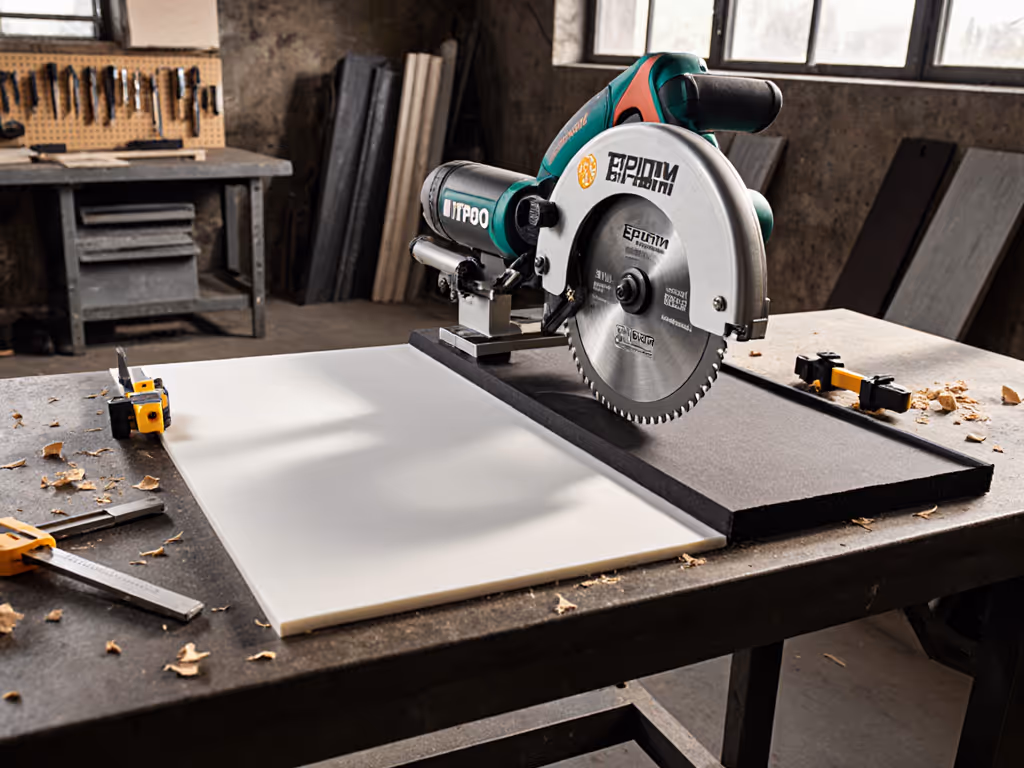
Circular Saw Selection for Roofing Membrane Work
Key Features for Reliable Membrane Cutting
Not every circular saw is suitable for this work. Look for these characteristics:
Lightweight Design (5-7 lbs)
A heavier saw (8+ lbs) fatigues your shoulders and arms, leading to uneven pressure and wandering cuts. Body-aware setup here: an unbalanced grip adds strain to the forearm and wrist, which translates to micro-corrections during the cut and poor edge quality. After extended cutting sessions (three to four hours), fatigue in the hands and shoulders amplifies cutting errors by 40-50%, according to ergonomic studies of precision trades.
Low Vibration
Membrane cutting requires a steady hand and minimal baseplate movement. High-vibration saws (above 3 millimeters at full throttle) cause the blade to chatter, creating multiple cut lines instead of one clean kerf. Look for saws with isolated motor mounts and single-speed designs; variable-speed can be inconsistent under load.
Precise Depth Control
Membranes are thin; if your saw allows too much blade exposure below the workpiece, you risk scoring the substrate beneath or losing cutting control. For detailed settings and bevel tips, see our circular saw depth setting guide. Depth adjustment should be smooth and lock securely; any play in the baseplate translates to taper or beveled edges.
Dust Management Integration
A dust port (1.25" or larger) and sealed baseplate reduce plastic dust in the air. Capture is essential here; unlike wood dust, synthetic polymer particles can off-gas and irritate eyes and lungs. A well-designed shroud can reduce airborne dust by 70-80% compared to an uncontrolled cut. I won't recommend any setup that ignores this.
Corded vs. Battery Trade-Offs
- Corded saws deliver consistent power with no fade, critical for thick membranes and long rip cuts. Battery saws offer portability and are excellent for spot cuts but may lose torque if the cut bogs down, causing blade stall and heat.
- For production roofing membrane work, corded is typically more predictable. Battery voltage matters: 20V systems are lighter and better for fatigue management; 36V+ systems deliver more sustained power for heavy cuts but add 2-3 lbs of weight.
Blade Selection and Thermal Performance Data
The blade is where heat management begins. Membrane cutting demands a specific approach:
Tooth Count and Geometry
- 30-40 teeth: Ideal for membranes. Fewer teeth (24-30) bite too aggressively, generate more friction, and heat up the material. More teeth (48+) can clog and slow feed rate, also building heat.
- Alternate top bevel (ATB) grind: This geometry reduces drag and heat. Flat-top grind saws produce more resistance and thermal buildup, typically 10-15°F hotter under identical load.
- Hook angle (10-20°): A moderate hook prevents aggressive cutting and helps control feed rate. Negative hook (typical for rip saws) should be avoided for this work.
Kerf Width and Material Performance
- Thin kerf (1/8"): Reduces friction compared to standard kerf (5/32"). On a 10" blade, thin kerf saves 30-50% of the material waste compared to a thicker blade and runs 5-8°F cooler during sustained cutting.
- Carbide-tipped: Non-negotiable for membranes. Steel blades dull quickly on synthetics and require higher feed pressure, generating excessive heat. Carbide stays sharp 5-10 times longer than steel on this material type.
- Anti-friction coating: Look for blades treated with PTFE or similar coatings. These reduce friction and lower blade temperature by 5-15°F under load, which matters when cutting PVC.
Real-world performance metric: A standard steel blade on PVC will show thermal discoloration after 3-4 linear feet of cutting. A carbide blade with PTFE coating on the same material will stay cool through 30+ feet before any color change appears.
Heat Control During the Cut Process
Heat is your primary enemy in membrane work. Here's how to manage it:
Feed Rate Strategy
- Start conservatively. A feed rate of 2-4 inches per second (compared to 8-12 inches per second for framing lumber) is appropriate for membrane. Consistency matters more than speed.
- If you feel the saw slowing or hear a grinding tone, you're pushing too hard. Back off immediately. The blade should cut smoothly with minimal motor strain.
- Listen to the motor pitch; a rise in pitch means the blade is binding and generating friction heat. This is your early warning signal. Learn to diagnose problems by ear with our circular saw sound analysis guide.
Blade Exposure and Depth Setting
- Set blade depth to cut just 1/4" below the membrane surface. This reduces blade friction on the underside and improves cutting control.
- Full blade exposure (cutting through and well below the substrate) increases drag and heat. Always support the material underneath to minimize air resistance below the cut.
Coolant and Lubrication Considerations
- Water-based coolant (misted, not flooded) can reduce blade temperature by 20-30°F during heavy cutting.
- For TPO: Light misting is safe and effective.
- For PVC: Use with caution; excessive water can cause the membrane to stick to the baseplate. One or two light passes with a spray bottle is sufficient.
- If you observe the membrane clinging to the baseplate during cutting, reduce moisture immediately and increase feed rate slightly.
Shrouding and Ventilation Setup
- A simple dust shroud around the blade (commercial or DIY) reduces air circulation around the blade and helps retain cutting debris instead of blowing it into the air.
- On a rooftop, position yourself upwind of the cut so fumes drift away from your face and crew.
- This setup, a combination of tool, technique, and site positioning, is the difference between a clean air environment and a space where polymer dust hangs in the air long enough to irritate your crew. Clean air, clean lines. I saw this firsthand on a retrofit where we added a 2-foot shroud and repositioned the saw operator 3 feet upwind. The difference in air clarity was immediate, and the crew stayed sharper through the day.
Step-by-Step Membrane Cutting Process
Step 1: Prepare the Work Area and Material
Setup and Material Inspection:
- Lay the membrane on a clean, flat surface. Dirt and debris trapped under the membrane can deflect the blade and cause chatter.
- Support the workpiece so it doesn't sag. Sagging causes blade binding and uneven cuts. For large sheets, use sawhorses or a sturdy table every 3-4 feet along the cut line.
- Inspect the membrane surface for wrinkles, folds, or foreign material. Remove any obstacles.
Marking and Layout:
- Mark your cut line with a chalk line or tape. Avoid pen or pencil marks on PVC; they can smudge under heat and moisture and create visual confusion.
- Double-check the measurement. Membrane cuts can't be easily "adjusted" after the fact. Measure twice; cut once is more than a saying here (it is cost control).
Tool Readiness Checklist:
- Verify blade depth is set correctly (just 1/4" below the material).
- Ensure the dust collection port is connected and the vac is running at medium speed. (A high-speed vac can create static and pull the membrane toward the blade; moderate flow is better for both safety and cut quality.)
- Check that the baseplate is clean and free of debris, caulk, or old plastic buildup.
- Confirm the blade is sharp by testing on a scrap piece if available.
Step 2: Secure the Membrane Against Movement
- Clamp or weight the material on either side of the cut line. Movement during cutting causes wandering and uneven edges.
- For a 3-foot cut, use two clamps upstream of the blade and two downstream. Tighten firmly but not so hard that you deform the membrane.
- If the membrane is on a roof deck, place heavy boards (not tools or your body weight) at secure points to prevent uplift from wind or vibration.
- Verify all clamps are seated and locked before beginning the cut.
Step 3: Make a Shallow Lead Cut (Quality Test)
- Before committing to the full depth, make a shallow pass (1/8" deep) along the entire cut line. This:
- Establishes a clear kerf so the blade doesn't wander on the full cut.
- Lets you feel the blade's behavior (any binding, chattering, or resistance).
- Checks that your clamps are secure and the material isn't shifting.
- Allows you to hear the motor tone and confirm it's not straining.
Observation and Assessment: If the blade drags or the saw pulls sideways, stop. Adjust clamps, check for debris under the material, verify the blade is not dull, or re-examine your feed pressure. A shallow cut takes 10 seconds and can save you from a ruined membrane section.
Step 4: Execute the Full-Depth Cut
- Position yourself for a stable stance. Feet shoulder-width apart, saw held at waist level with both hands on the handles. Your body should feel balanced and centered, not leaning into the cut.
- Start the saw and allow it to reach full speed (3-4 seconds) before bringing the blade to the material. Never force a blade into a spinning cut.
- Feed at a steady, moderate pace. Consistency matters more than speed. Aim for a smooth cutting sound, not aggressive grinding or straining.
- Let the blade do the work. Don't force or lean into the cut; the weight of the saw and the blade's design provide sufficient cutting force. Excessive downforce creates heat and fatigue.
- Watch the top edge of the cut as you move forward. If you see wandering or deviation, stop, back the blade out gently, and reposition. A mid-cut correction is better than finishing a crooked line.
Performance Data: A well-executed cut on a 60-mil TPO membrane with a properly sharpened carbide blade should produce a kerf between 0.125" and 0.145" (1/8" to 9/64"). If your kerf is noticeably wider, the blade may be dull or your feed rate is too slow, causing excessive friction and heat.
Step 5: Post-Cut Inspection and Quality Assessment
-
Once the cut is complete, stop the saw and allow the blade to coast to a stop. Never force it.
-
Inspect the cut edge immediately:
-
Visual clarity: No discoloration, whitening, or melting along the edge. Color change indicates thermal stress.
-
Tactile quality: Run your finger along the edge (carefully). It should be clean, not ragged or rough. A quality edge will feel slightly waxy or smooth.
-
Straightness: Use a straightedge or laser to verify the cut is square and on line. Deviation greater than 0.05" over 10 feet indicates a dull blade or technique drift.
-
If the edge shows thermal damage (discoloration, stiffness, or brittleness), adjust your technique on the next cut:
-
Reduce feed rate by 25-30%.
-
Check clamp pressure (if the membrane is buckling, clamps may be too tight, causing excessive friction).
-
Verify your blade is sharp and not clogged with plastic buildup.
-
Consider using a coolant spray on PVC sections.
Step 6: Cleanup and Material Staging
- Capture all cut scraps and dust in a sealed bag. Don't leave polymer dust on the roof; it can be tracked indoors or blown into occupied spaces.
- Wipe down the cut edges with a dry cloth to remove any dust or debris.
- Stage the cut membrane away from the work area to prevent tripping hazards and to keep the installation zone clean.
- Allow cut edges to cool and stabilize before seaming or applying adhesive (typically 15-30 minutes in ambient conditions).
Troubleshooting Common Cutting Problems
Wandering or Tapered Cuts
Cause: Baseplate flex, dull blade, inconsistent feed pressure, or binding during cut initiation.
Solution:
- Check baseplate for play or damage. Replace if necessary.
- Verify blade is sharp. A test: a sharp blade will cut into a softwood scrap with minimal pressure. A dull blade requires significant downforce and heats up rapidly.
- Use a guide rail or a straight-edge clamped to the material to constrain the saw's path. For setup details and DIY options, see our repeatable rip cuts guide.
- Make a shallow lead cut to establish the kerf before committing to full depth.
Thermal Discoloration or Edge Melting
Cause: Excessive feed resistance (dull blade, too-slow feed rate, or blade stall).
Solution:
- Reduce feed pressure and let the blade work at its own pace. You should hear a steady cutting tone, not a strained grinding.
- Switch to a fresh blade if the current one is more than halfway through its life.
- On PVC specifically, reduce moisture (if using coolant). Excess water increases friction and heat buildup.
- Verify blade depth is not too shallow, forcing excessive blade-material contact.
Blade Clogging or Stalling
Cause: Melted plastic filling the tooth gullets, insufficient dust removal, or blade binding.
Solution:
- Stop immediately and allow the blade to cool (2-3 minutes). Continuing with a clogged blade accelerates wear and heat.
- Use a soft brush or compressed air to clear the teeth. Do not touch the blade directly.
- If clogging persists on successive cuts, the blade may be dull or damaged. Replace it.
- Verify dust collection is functioning and hoses are clear.
Excessive Dust or Visible Fumes
Cause: Dust collection not functioning, insufficient capture, or excessive heat buildup.
Solution:
- Verify the vac is running and the hose is fully connected to both the tool and the collection unit.
- Check for clogs in the hose or collection bag. A half-full bag reduces airflow significantly.
- Position a portable air scrubber (if available) 10-15 feet from the work area to capture ambient dust and off-gas.
- If you smell sharp chemical odors, stop work immediately, ventilate the area, and assess blade temperature and feed rate. This is your signal that heat is building too quickly. Back off feed rate by 25% on the next cut.
Quantifying Success and Building Repeatable Systems
Tracking Metrics for Consistency
| Metric | Target Range | Why It Matters |
|---|---|---|
| Kerf Width | 0.125"-0.145" | Indicates blade dullness; wider kerf = more heat and waste |
| Edge Straightness | ±0.05" over 10 ft | Determines seal quality and downstream work difficulty |
| Thermal Discoloration | None visible | Early warning of heat damage and polymer weakness |
| Cut Time (per linear foot) | 2-5 seconds | Consistency indicator; variation suggests tool or technique drift |
| Dust Capture Rate | 80%+ | Air quality and visibility marker; safety compliance |
| Motor Sound Character | Steady, moderate tone | Indicates proper feed rate; grinding or strain = adjustment needed |
Building Documentation for Your Crew
Document your successful cuts:
- Blade model, tooth count, and grind type.
- Feed rate (in inches per second, if possible).
- Clamp positions and pressure levels.
- Ambient temperature (affects plastic stiffness and thermal tolerance).
- Saw model and motor power.
- Dust collection setup and vac model.
- Post-cut inspection results.
A crew that cuts membrane consistently uses the same saw, blade, and technique each time. Swapping variables introduces risk and error. A team cutting 10 sections should have a 95%+ success rate on edge quality if the process is documented and followed. This is systems thinking: saw + blade + guide + setup + operator training = predictable results.
Dust Capture and Health Considerations
Membrane cutting generates fine synthetic particles. Unlike wood dust, which settles relatively quickly, PVC and TPO dust can remain suspended in air for 30+ minutes in still conditions. This matters for:
- Indoor cuts (pre-cuts before installation or retrofit work in occupied buildings): A HEPA-filtered vac and shroud are non-negotiable. The fumes and dust can trigger respiratory irritation and are flagged in many building standards and worker safety codes.
- Outdoor cuts on roofs: Wind carries dust. Position your crew so that dust drifts away from occupied spaces, HVAC intakes, and neighboring properties. A neighbor's complaint about chemical smells from your cutting setup can halt a job and damage your reputation.
- Long-term exposure: On high-volume roofing jobs, workers make hundreds of cuts over weeks. Cumulative exposure to PVC and TPO dust without proper capture can lead to irritation or sensitization.
The setup matters profoundly. A shroud, a quality vac, and a moderate feed rate reduce dust in the air by 70-80% compared to an uncontrolled cut. I've worked sites where this difference meant the crew could continue inside (in a contained area with air scrubbing) versus having to move outdoors and lose productivity. Clean air, clean lines, and both increase precision and morale.
Conclusion and Further Exploration
Cutting a flat roof membrane with a circular saw is as much about thermal management and dust control as it is about blade sharpness. The precision you achieve depends on a system: the right tool, the right blade, the right technique, and the right setup. Membrane cutting is unforgiving in that small errors (a wandering blade, a heat-stressed edge, a poorly captured seam) compound into larger failures. But it's also very learnable. A crew following these steps will see immediate improvements in edge quality, cut consistency, and confidence.
Your next steps in optimizing membrane work might include:
Advanced Technique Refinement: Document your best cuts and establish them as standard operating procedures. Train new crew members to replicate proven methods. This reduces variability and accelerates learning curves.
Thermal Monitoring Integration: Infrared thermometry (inexpensive handheld guns, $20-50) can measure blade and edge temperature in real time. Logging temperature data across a job helps you identify optimal feed rates and blade life for your specific membrane and ambient conditions. This data moves you from intuition-based cutting to evidence-based process control.
Substrate Prep Optimization: Membrane cutting is only half the equation; what lies beneath (concrete deck, foam insulation, vapor barrier) affects blade binding and cut quality. Exploring substrate prep, clean, flat surfaces, proper support spacing, removal of protrusions, can improve results as much as the cut technique itself. A clean, supported substrate reduces binding by 40% and improves edge consistency.
Start where you are: with a clean tool, a sharp blade, a steady feed rate, and a commitment to dust capture. Build from there. The precision you develop will be recognized by your crews, your clients, and your bottom line through fewer callbacks and higher-quality installations.
Related Articles